
A'PEXi Super Air Flow Converter (S-AFC)

Notice: Undefined variable: banner in /home/alan92rttt/public_html/rbs_3sgto.php on line 17

Installation Procedure for Mitsubishi 3000GT
After installing the boost controller, exhaust and all other mods, I wanted to control the fuel to prevent any lean condition that would cause to blow anything under the hood. The AFC allows to change the fuel +/- 30% for 5 specific rpm ranges. The ranges are connected together, to allow the user to build the desired fuel curve over the full range. The device works as it reads the MAF signal and converts it up or down related to the settings. It therefore tweaks the ECU what the real amount of air is and therefore causes the system to deliver more or less fuel.
A'PEXi does not recommend to set the fuel/rpm during driving. Also the AFC box is somewhat bigger than the Blitz parts and its DIN mount. Therefore it does not fit into the front middle console. Find a place where you can access the part easily but not having trouble to see what dial you change...
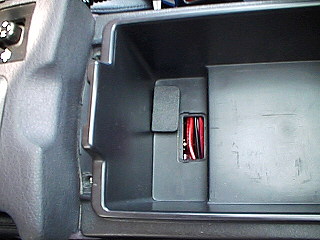 |
The best place I found was in the the storage box in the middle console. Especially because the box has already a capped hole on the under side that looks like the engineers knew that somebody wants to install a device in there ;-) This picture shows the open hole with the already removed cap (pop it out form the bottom side). The cabling you can see is from the stereo equippment going to the trunk. Don't worry there's enough space for the AFC harness too. |
|
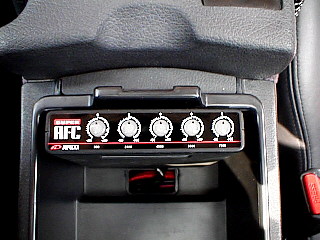
I mounted the AFC with two THICK velcro tapes onto the front side of the box. This because it should not be mounted directly to the front wall due to the cover that would touch the AFC when open/close it. Even with this it looks good in there... |
 |
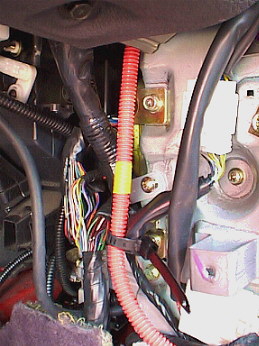 |
Firstly remove the side carpet panel from the middle console. To do this please move the drivers seat as back as possible. There's only one screw on the side of the stereo. Near the throttle pedal there's a plastic bolt that can be pulled out. Finally pull the carpet panel out of the shifter console. Now slide the panel down as there's a small clip on the top (dashside) of it. Now locate the ECU wiring harness containing tons of wires. You don't need to pull the ECU out as you can easily (more or less) detach the connectors. Also it's not necessary to remove any tape but it would be a good thing to add some tape afterwards. |
|
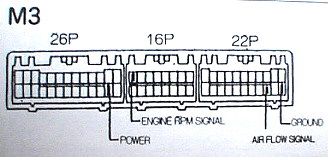
Next locate the wires that are used for the AFC. For this use the picture in the A'PEXi booklet that shows the location of the pins in the connectors. There's only the Air Flow Signal wire that have to be cut. Use the delivered connectors for this wire. The other three lines (RPM,PWR,GND) should be tapped in. |
 |
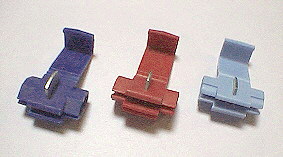 |
The easiest and safest way to tap the wires in is to use some clips as shown here (not included). I also used different colors to prevent any wrong connections. Furthermore you can attach other connectors (not included) to these tapped-in cables that go to the harness as this will allow you to remove it easily if necessary. |
|
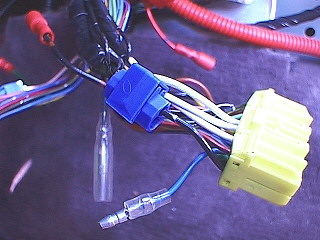
This is how the 22p connector looks with the tapped in GROUND wire and the female connector on the rear side for the harness. Below you can see the cut Air Flow Signal wire with the two connectors that came with the kit. Please note that the connectors side of the wire is attached to the male connector and the sensor side to the female connector. The other wires are tapped the same way to the other ECU connectors. |
 |
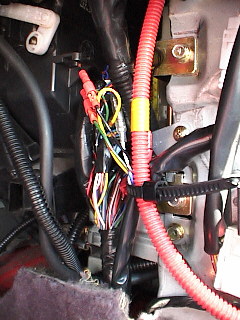 |
If all wires are done connect the harness to the connectors (if used) and plug the yellow connectors back into the ECU. Use some tape or something else to secure the wires. I used the black wire tie that has space enough to hold the additional harness. Finally route the AFC harness below the carpet to the rear of the middle console. Before the parking break the harness goes into the console and appears below the storage box. An easy thing :) Reinstall the side panel and the bolts of the the storage box. |
Now just connect the harness and put the AFC onto the velcro tapes and the installation is done. Also reconnect the battery at this time. I did the job within an hour and had no problems.
Before starting the engine I've set the dials to 0 for all rpms. The engine started and everything worked well. I drove the car around to ensure that everything is ok and to give the ECU some time to relearn.
Here the first question came up. Must the car relearn each time a setting have changed ? Till today nobody was able to tell me.
Finally I made some G-Tech runs and also increased the boost limiter on the Blitz DSBC. I had a stumbeling problem around 5200-5600 before the AFC and hoped to get rid of it with the help of the AFC. Therefore I increased the fuel about 10% at 4000 and 5600. I started hard and at about 4800 I got that annyoing fuel cut. Boost was about 1.25bars. I just hung in the belts and was close to loose my teeths in the steering wheel. Fuel cut is caused by the ECU calculating injector time, boost level and other variables. Also in some circumstances fuel cut can be caused by knock.
I then decreased the fuel by about 5% at the same rpms and I did not runned into the fuel cut again. Also the stumbeling problem went away and I was able to run more than 1.31bar boost without a problem. Of course, the car is in danger to run very lean and therefore could cause to knock. Unfortunately the Cyberdyne A/F meter is not helpful on our cars as the signal jumps around too much. I therefore was not able to determine any lean condition. I tried to listen to any sign of knock but couldn't hear anything. Maybe due to the 98 octane gas I always run :)
© Copyright 1998 3000GT Web Team. All Rights Reserved.